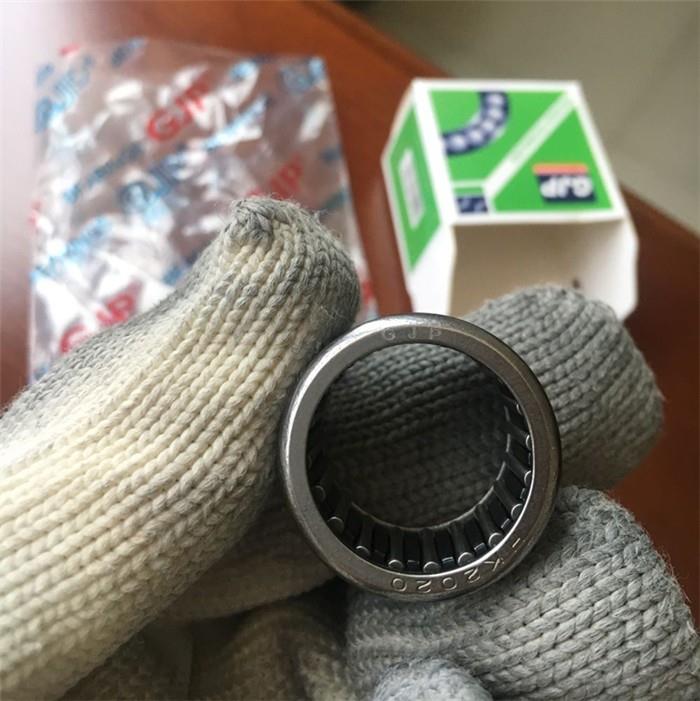
Step 1: Clean the drawn cup needle roller bearings and remove the rust preventive oil.
After soaking and hand-turning cleaning with a highly volatile solvent such as refined kerosene and naphthol, remove refined kerosene, etc., with gasoline or ethanol. When blowing off cleaning oil with an air gun, pay attention to the cleanliness of the air. When oil-air lubrication is used, it can be used directly, but it is recommended to use it after applying or soaking in lubricating oil or low-viscosity oil after cleaning.
Step 2: Dry the drawn cup needle roller bearings without moisture residue.
When using grease lubrication, it is necessary to dry the drawn cup needle roller bearings sufficiently in order to prevent the grease from flowing out. In addition, they should be sealed with grease immediately after drying. Drying can be carried out with warm air or in a constant temperature bath.
Step 3: Encapsulate the grease.
After encapsulation, turn the rolling part by hand to fully coat the grease.
Ball bearings can be used with a syringe, vinyl bag against the rolling surface of the inner ring to encapsulate grease in equal amounts between the balls. When there is a raceway ring guided cage, it is recommended to use a spatula and other small tools to apply it to the cage guiding surface. If it is not possible to encapsulate the rolling surface of the inner ring due to the narrow space of the inner ring, encapsulate the rolling surface of the outer ring. In this case, every effort should be made to rotate by hand to make the grease penetrate into the inner ring.
When applying grease to the outer diameter surface of the rollers of roller bearings, rotate the rollers with fingertips to make the grease penetrate into the inner ring.
Step 4: Test run.
- Oil-air and oil-mist lubrication. In oil lubrication, the drawn cup needle roller bearings temperature plateaus in a relatively short time before it reaches its peak, so test runs are relatively simple. It is recommended to keep the bearings at 2000-3000 revolutions per minute for about 30 minutes and gradually increase to the working speed. However, if the Diameter of the center of the rolling element * speed exceeds the range of 1,000,000 cycles, the speed should be increased in units of 1,000-2,000 revolutions per minute in order to ensure safety.
- Grease lubrication. In grease lubrication, test runs are important to stabilize the temperature rise. During the test run, an increase in speed shows a rapid temperature rise, which peaks and then stabilizes slowly. It will take some time to stabilize.
- Ball bearings. It is recommended that the speed be increased in units of 1,000 to 2,000 revolutions per minute after the temperature has stabilized.Diameter of the center of the rolling element * rotational speed exceeding 400,000 cycles should be increased in units of 500 to 1,000 revolutions per minute to be on the safe side.
- Roller bearings. Compared to ball bearings, roller bearings take longer to reach peak temperatures and stabilize temperatures during trial operation. In addition, since temperature changes cannot be stabilized due to the temperature rise caused by the re-entry of grease, they should be operated at the maximum speed for a longer period of time. It is recommended that the speed be increased in increments of 500 to 1,000 revolutions per minute until the temperature stabilizes. Diameter of rolling element center * rotational speed exceeding 300,000 cycles should be increased in increments of 300 revolutions to be on the safe side.
Step 5: Assemble the drawn cup needle roller bearings.
When assembling bearings on a spindle, the shaft and the inner ring of the bearing are assembled with an interference fit (tight fit), and there are usually two methods of assembly: pressing in with a hydraulic press and inserting by hot fitting.
Regardless of which method is used, it is necessary to minimize the impact of assembly and maintain the accuracy of the bearing.
- Pressing in with a hydraulic press:When pressing in drawn cup needle roller bearings by means of a manual press, etc., it is first necessary to calculate the press-in force based on the interference between the shaft and the inner ring (a hydraulic press with a working pressure greater than the required pressure must be used). Then, when pressing in the inner ring, the inner ring press-in tool should be used to actually press it into the shoulder of the shaft (do not apply force to the outer ring). After pressing in, measure the accuracy of each part of the bearing to confirm that it is actually mounted on the shaft. In addition, when using multi-row bearings, the runout should be measured after assembly to correct the axial deviation between the outer rings.
- Insertion by hot loading:Make full use of the cause of thermal expansion and contraction, and insert the drawn cup needle roller bearings after being heated and expanded, generally to the extent of heating to 30 degrees Celsius, and it should be noted that: when using resin material as the cage of the angular contact ball bearing, do not heat it to too high a temperature, and the maximum should not be higher than 80 degrees Celsius. And because of cooling, the inner ring shrinks toward the shaft, and a clearance is generated between the bearing and the shaft shoulder. Therefore, reduce the temperature to room temperature after mating, and then press it with a hydraulic press or the like. Also, check the perpendicularity after cooling. When heating with a bearing heater, be careful of excessive temperature rise, and use equipment with a demagnetizing device that can remove residual magnetism.
Step 6: Secure the inner ring.
When mounting and securing drawn cup needle roller bearings on a spindle, the inner ring is usually tightened with a trapezoidal socket or precision bearing nut on the inner ring side, and the front cover is tightened with a bolt on the outer ring side. The following points should be noted when using a trapezoidal socket or precision bearing nut to tighten the inner ring.
- Fixed with a trapezoidal sleeve:A trapezoidal sleeve is a relatively easy fixing method by inserting a sleeve that expands due to oil pressure into the shaft, applying the required press-in force, removing the oil pressure, and applying a lyrical force to the bearing while fixing the sleeve to the shaft. However, since the fixing of the sleeve is realized only by interference with the shaft, the shaft may loosen when bending is generated and when moment load is applied.
- Tighten with precision bearing nuts:The tightening force of the precision bearing nut is given in accordance with the tightening torque control regulations for precision lock nuts. In addition, when the bearing is secured with a precision bearing nut, the nut is tilted due to the clearance of the thread, and fine adjustment may be required to achieve rotational accuracy of the shaft.
- Relationship between tightening torque and tightening force of precision bearing nuts:Since the threaded surface of the precision drawn cup needle roller bearings nut and the threaded surface of the shaft and the seating surface of the precision bearing nut are sliding surfaces, depending on the friction coefficient at the time of tightening, the relationship between the torque and the tightening force will change, and it should be allowed to fully break in. In addition, it is important to calibrate the relationship between the tightening torque and the tightening force by using a force measuring washer or the like in advance. Up to this point, the installation of bearings has been basically completed, but due to the installation process, may lead to such as gasket deformation, the front cover crimp produces margins, clearance is too large or too small and other issues, in the next chapter, I will bring you the solution to this type of installation problems, to ensure that the installation of the drawn cup needle roller bearings can maintain the best operating conditions, long operation without failure.
Related Products